Beauty Of Nature Constellation Tutorial

Supplies:
PSP X3 (All Versions Should work)
Jasc Animation Shop
Tubes: brdyellowbutterfly.psp,brddaisys.psp,brdtext.psp,monarch.psp
Image: brdwhitelacemasked.jpg
Background Fill: brdyelloworangebk.jpg
Plugins: Alien Skin Xenofex 2 Constellation, Gregs Factory Output Vol. 2 Pool Shadow
Getting Prepared:
Download Supplies
Download Plugins
Download Alien Skin Xenofex 2 Constellation
Download Gregs Factory Output Vol. 2
Save them to your Plugin Folder before opening up your PSP.
Open brdwhitelacemasked.jpg in your paint shop pro.
Step 1:
Open the tubes brdyellowbutterfly.psp,brddaisys.psp,brdtext.psp
Activate brdyellowbutterfly
Edit Copy
Activate brdwhitelacemasked.jpg
Edit Paste as a new Layer on the brdwhitelacemasked.jpg
With the Move Tool 
Move it to the right see my picture for placement.
You can close the brdyellowbutterfly you will not need that anymore.
Activate brddaisys
Edit Copy
Activate brdwhitelacemasked.jpg
Edit Paste as a new Layer on the brdwhitelacemasked.jpg
With the Move Tool 
Move it to the left and down a bit see my picture for placement.
You can close the brddaisys you will not need that anymore.
Effects 3D Effects Drop Shadow
with the settings below
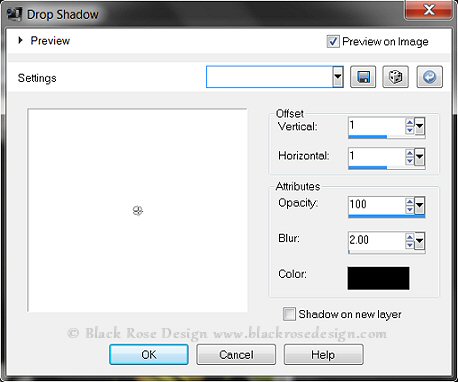
Settings:
Vertical- 1
Horizontal- 1
Opacity- 100
Blur- 2.00
Color- black (#000000)
Shadow on new layer unchecked
Activate brdtext
Edit Copy
Activate brdwhitelacemasked.jpg
Edit Paste as a new Layer on the brdwhitelacemasked.jpg
With the Move Tool 
Move it above the daisys see my picture for placement.
You can close the brdtext you will not need that anymore.
Activate monarch
Edit Copy
Activate brdwhitelacemasked.jpg
Edit Paste as a new Layer on the brdwhitelacemasked.jpg
With the Move Tool 
Move it above brdtext see my picture for placement.
You can close the monarch you will not need that anymore.
Layer New Raster Layer
Add your Watermark
Layers Merge Merge All (Flatten)
Step 2:
Image Add Borders 1 black (#000000)
Symmetric checked
Open brdyelloworangebk.jpg
and on your Materials Palette
Set your foreground to the brdyelloworange pattern
with the settings below
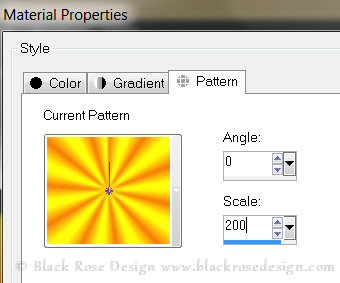
Settings:
Angle- 0
Scale- 200
Activate your brdwhitelacemasked image again
Image Add Borders 4 white (#ffffff)
Symmetric checked
Click your Magic Wand Tool  to make it active
with the settings below

Settings:
Mode Add (Shift)
Match Mode RGB Value
Tolerance 25
Contiguous Checked
Feather 0
Anti-alias Checked
Inside
Click on the white border you just added and select it
with your Magic Wand Tool 
Click your Flood Fill Tool  to make it active
Fill the white border with the brdyelloworange pattern
Selections Select None (Ctrl+D)
Image Add Borders 1 black (#000000)
Symmetric checked
Image Add Borders 20 (#202020)
Symmetric checked
Click your Magic Wand Tool  to make it active
with the settings below

Settings:
Mode Add (Shift)
Match Mode RGB Value
Tolerance 25
Contiguous Checked
Feather 0
Anti-alias Checked
Inside
Click on the (#202020) border you just added
Effects Plugins Gregs Factory Output Vol. 2 Pool Shadow
with the settings below
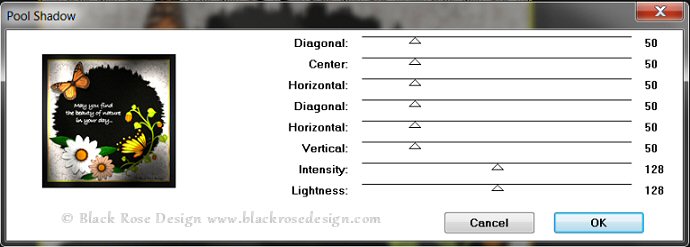
Settings:
Diagonal- 50
Center- 50
Horizontal- 50
Diagonal- 50
Horizontal - 50
Vertical- 50
Intensity- 128
Lightness- 128
One More time with
Effects Plugins Gregs Factory Output Vol. 2 Pool Shadow (same settings)
Selections Select None (Ctrl+D)
Image Add Borders 4 white (#ffffff)
Symmetric checked
Activate your Magic Wand  same settings as before
Click on the white border
Click your Flood Fill Tool  to make it active
Fill the white border with the
brdyelloworange pattern
(settings are the same)
Selections Select None (Ctrl+D)
Step 3:
Are you ready for some animation :)
Activate your Magic Wand  same settings as before
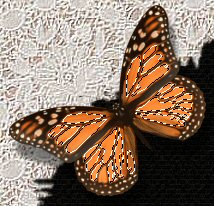
We are going to click on the monarch butterfly
and make quite a few selections inside the lines on its wings.
You will have to click around a bit
see picture below

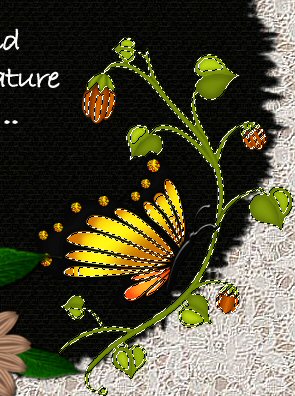
When you are finished with that go to the yellow butterfly
and click on that too. We will make quite a few selections
You will have to click around a bit
see my picture below

Now on to the daisys but first we will need to change our Magic Wand settings
with the settings below

Settings:
Mode Add (Shift)
Match Mode RGB Value
Tolerance 15
Contiguous Checked
Feather 0
Anti-alias Checked
Inside
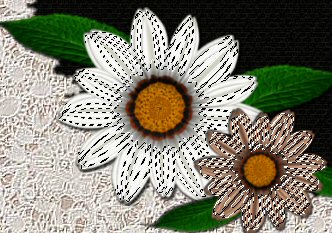
Start clicking around on the daisys and
make quite a few selections also on this one.
You will have to click around a bit
see my picture below

Step 4:
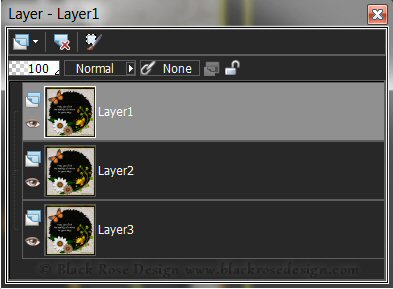
Layers Duplicate 2 times and you should now have 3 layers
Lets rename them starting from the top
Layer 1,Layer 2,Layer 3
Right click on the top layer
Click on Rename
in the line type in Layer 1 and click on it.
Do this to the other two Layers until you have all 3 renamed.
Your Layer Palette should look like the picture below

Highlight Layer 1
Effects Plugins
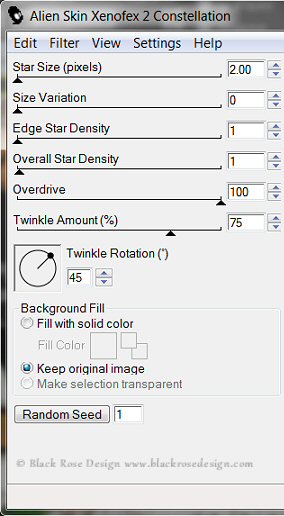
Alien Skin Xenofex 2 Constellation
with the settings below

Settings:
Star Size- 2.00
Size Variation- 0
Edge Star Density- 1
Overall Star Density- 1
Overdrive- 100
Twinkle Amount- 75
Twinkle Rotation- 45
Keep Original Image Checked
Random Seed 1
click ok
Highlight Layer 2
Effects Plugins
Alien Skin Xenofex 2 Constellation
with the same settings except click on the Random Seed button once
click ok
Highlight Layer 3
Effects Plugins
Alien Skin Xenofex 2 Constellation
with the same settings except click on the Random Seed button once more
click ok
Selections Select None (Ctrl+D)
Step 5:
Open Animation Shop
Go Back to psp
Make sure your on Layer 1
Close off Layers 2 and 3
Highlight Layer 1 so its the active layer
Edit Copy Special Copy Merged for psp X2 and X3
(for other versions of psp Edit Copy Merged)
In Animation Shop Edit Paste as a New Animation (Ctrl+V)
Go Back To PSP
Close Off Layer 1 Open Layer 2 Layer
Highlight Layer 2 to make it active
Edit Copy Special Copy Merged for psp X2 and X3
(for other versions of psp Edit Copy Merged)
In Animation Shop Edit Paste After Current Frame (Shift+Ctrl+L)
Go Back To PSP
Close Off Layer 2 Open Layer 3
Highlight Layer 3 to make it active
Edit Copy Special Copy Merged for psp X2 and X3
(for other versions of psp Edit Copy Merged)
In Animation Shop Edit Paste After Current Frame (Shift+Ctrl+L)
Edit Select all (Ctrl+A)
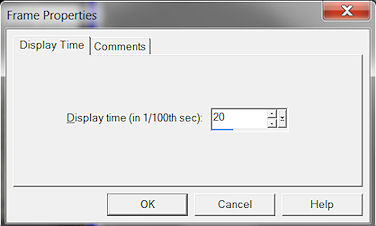
Animation Frame Properties (Alt+Enter)
Set the Display time to 20

Go up to View Animation
File Save as gif
Click Next on the next 3 screens and then click Finish.
Hope you enjoyed my tutorial :)

This tutorial was written on 1/8/2011 from my own ideas and any resemblance
to any other tutorial is purely coincidental.


 to make it active


 to make it active
